
Last Updated on November 7, 2021 by Guillermina
Today, we’re going to be looking at how to personalize your shoes; whether it’s painted wedding shoes or glittering up your shoes – you want to make them your own. The shoes you choose for your wedding day are probably the most important pair of your life.
However, you may not have the budget for your dream sparkly shoes. Or you may want a one-off design to make your shoes one-of-a-kind. If so, this post is for you! Let’s take a look at some DIY ideas for wedding shoes.
DIY Wedding Shoe (Painted Wedding Shoes)
So you’ve found your dream shoes, there’s just one small problem – they’re not the right color. This may seem like a problem, but it’s easier to rectify than you may think. It will take time, patience and quite a few products, but it’s definitely possible! If you’re wanting a block color, it’s relatively straightforward with the right paint (we’ll be looking at that later!). But if you’re looking to change a certain part of the shoe to another color – it can be tricky!
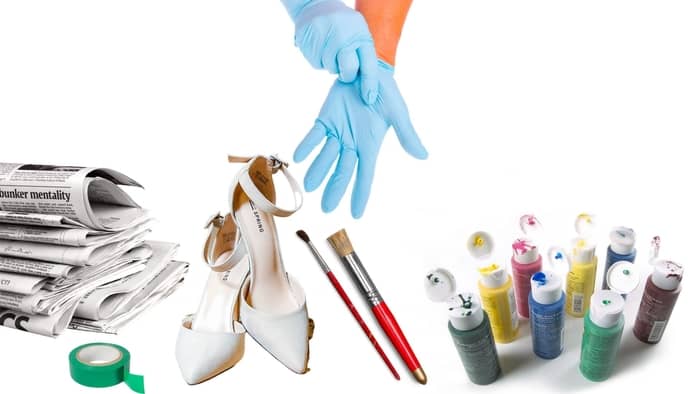

The items you’ll need to change one part of your wedding shoes are:
- Shoes
- Paint in the desired color(s)
- Acetone
- Finisher
- Painter’s tape
- Rubber Gloves
- Brushes
- Old rag
- Knitting needle
- Paint dishes
- Old paper
Off Beat Bride has a step-by-step guide on how to make the perfect wedding shoe upgrade with acrylic paint. You can find the full guide here. Impressive, right?
Glitter Shoes DIY
You may not want to change the color of your shoes – but you may want to glitz them up! I had completely glitter shoes for my own wedding, and it’s easy to see why it’s so appealing. Glitter shoes make you feel like a real-life Cinderella – and what more could you want for your wedding day?
If you’ve chosen some gorgeous white heels for your wedding, but want to add a little sparkle – it’s surprisingly easy to get them looking glamorous! Here’s what you’ll need:
- Your shoes (preferably white so you do not need to paint them)
- PVA glue
- At least two paintbrushes
- A whole lot of glitter!
- Paint your shoes with acrylic paint if needed and leave to dry for around an hour.
- With a large paintbrush put the glue glitter mix on a small section of the shoe.
- Sprinkle loose glitter over the top. (Use a bowl underneath to catch any falling glitter).
- Press the loose glitter into the glue firmly.
- Repeat over the entire shoe. And then repeat with the next shoe.
- If there’s any gaps, or some patches don’t look quite as sparkly – add some more! You can never have too much glitter. Leave to dry (overnight is best)
- Paint with a very thin layer of glue to seal the glitter in place and leave to dry.
Your shoes are ready! You may want to practice on a cheap pair of shoes first, that way you can perfect your glittering skills before starting on your wedding shoes. You don’t want your wedding shoes to have any mistakes, so keep any imperfections to the trial shoes!
Read more about When Do You Ask Your Bridesmaids The Big Question?
Must-Have Products for DIY Wedding Shoes
You may be wondering which products to use. Which paint is best? Which glitter is best? Don’t worry, we’ve got you covered! Here are some of the bestselling products when it comes to customizing your own shoes. Whether you’re wearing sneakers to your wedding, or heels, here are the best products to use.
- Angelus Acrylic Paint. Angelus is by far the most popular choice for acrylic paint. Not only do they have the most vibrant colors, they’re durable, long-lasting, and work on various materials…including shoes. They come in a range of styles and finishes, so choose which best works for your shoes. The best part is, it’s affordable too!
- Krylon Glitter Blast. If you’re not using loose glitter, this spray is perfect! It takes glittering to the next dimension, is durable, and works on virtually any surface…including shoes!
- Fine Brushes. While you may be looking for the most affordable options to keep the price down, brushes is not something you want to skimp on. If you’re adding fine detail to your shoe, you want to be precise and very careful, SUCOOL is a great place to start for fine brushes.
- Embroidery Pen. If you’re not a beginner with customizing shoes, you may want an embroidery pen! If you’re wanting to add a certain design to your shoe, like the words “I Do”, or incorporate the date of your wedding into the final design – you can use an embroidery pen! It’s important to note that if you’re a newbie with customization, you may want to stay away from products like this. Or get lots of practice in beforehand before you try anything on your wedding shoes.
- Patience and Time. While this may not exactly be a product, this is something you’ll need in bucketfuls! It can be time-consuming, and quite difficult, depending on how creative you are. So be sure to leave enough time to get your dream shoes finished!
Conclusion
I hope this article has helped you learn how to create the perfect painted wedding shoes and how to make gorgeous glittery heels. Whichever you decide to choose, make sure you have all the correct products and do not go straight to work on your wedding shoes until you’re completely comfortable with customizing. Having a one of a kind shoe for your wedding makes them even more special, and will certainly leave your guests with serious shoe envy!
Did you customize your own wedding shoes? With glitter or paint? If so, I would love to hear how they turned out! And if you have any top tips or tricks, please feel free to leave them in the comments below. You may be helping out future brides with their own shoes. Sharing is caring!