
Last Updated on September 19, 2021 by Guillermina
Today, we’re going to be looking at how to make wedding chair covers yourself for your wedding. Plus a variety of chair covering ideas. DIY wedding chair covers are becoming increasingly popular. This is because whether you decide to buy or rent ready-made chair covers, it can take a considerable chunk out of your budget. If you have time on your hands, deciding to make them yourself can save a large sum of money in the long run.
There’s a range of fabrics you can use, with tulle chair covers being one of the most popular. Tulle is a lightweight netting that can be made from a range of fibers, such as silk or polyester. But you can really opt for any material you would like.
Choosing the Right Material
Before we look at how to make them, you first need to decide on the material for your chairs. The chair material all depends on the type of wedding you’re having. Let’s look at a few options.
- Organza. This material is perfect if you’re working with a tight budget. It’s the cheapest option available and usually the material you’ll most often see at weddings. It’s lightweight, sheer, and has a smooth finish.
- Satin. This is a slightly more luxurious material. It’s glossy, silky, and surprisingly easy to work with. When making the chair covers yourself, this is a great material for beginners, as it is so pliable.
- Taffeta. If you’re looking for extravagance, taffeta is a stunning option. Lots of couples opt to put brooches onto their taffeta chair covers for a bit of extra flourish.
Of course, there are many other materials you can use for your chairs, those are just the most popular for weddings.
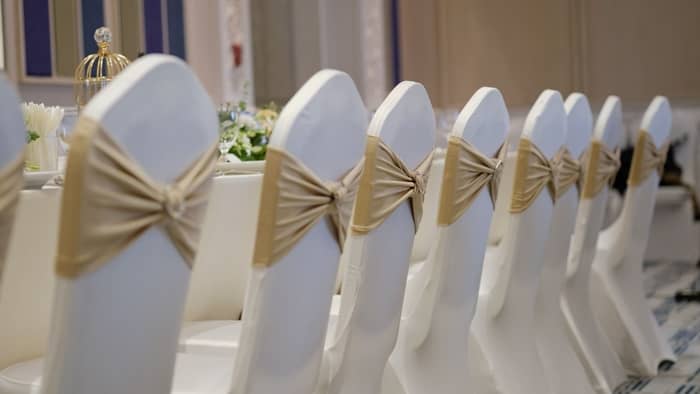

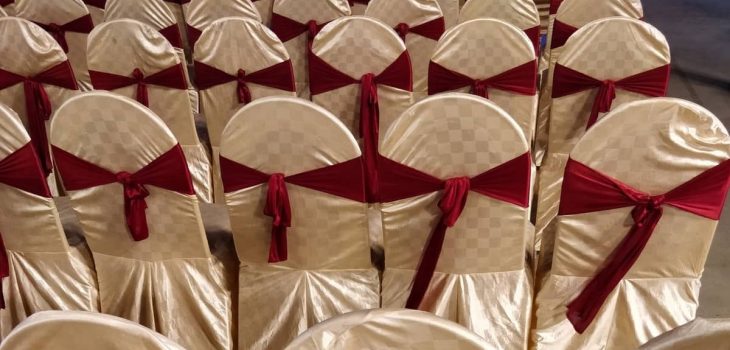
Which Bow Should You opt For?
There’s a wide range of bows you may like to use for your chair covers. Let’s look at the most common you may find at weddings.
- The Traditional Bow – if you want your wedding to be traditional and you’re not one for steering away from the “norms” of a wedding, this bow is perfect. It’s quick and one of the easiest.
- The Side Bow – this is by far the easiest option of all. If you don’t have much time, but still want a classy, elegant look from your chairs, this is the bow for you.
- Double Loop Flower – if time is on your side and you have lots of hands to help out, I would recommend the double loop flower. The end result is stunning.
We’ll take a look at how to tie these knots later!
How to: Fit a Banquet Chair
So you’ve chosen your material, you’ve got it to size and now it’s time to start work. Fitting a banquet chair is easier than you think. Before you bling up your chair, you may want to put a banquet cover over the top. Many wedding venues provide these for you, so it shouldn’t be an additional cost.
However, if your chairs are looking bare and need to fit the banquet covers yourself, this video shows you a step-by-step guide how. It only takes 30 seconds, but if you have a few hundred chairs to do…it could take a while!

How to: Tie a Bow
As we’ve seen, there are a variety of bows you may like to use at your wedding. The most popular is the traditional bow, so that’s what we’ll be looking at today. However, there are plenty of video tutorials for every wedding bow you could possibly imagine! So if the traditional bow isn’t for you – YouTube is your oyster.
Even though the traditional bow is one of the easiest options you can choose, if there’s a lot of guests – it’s going to take time to tie tens, if not hundreds, of bows. Totally Dazzled has an amazing tutorial (and video) of How to Tie a Chair Sash. She shows you how to do a short-tailed traditional bow and a long-tailed traditional bow.
Dressing Up Your Chairs
So your banquet cover is on. Your bows are tied perfectly. But something still feels missing. If this is the case for you, there are plenty of ways you can dress up your chair to make it look even more beautiful. Here’s a few ideas:
- Mr. and Mrs. signs on the back of your chairs will look super cute. If you’re having a chic wedding, wooden signs with italic font is perfect
- Brooches to add to the center of your chairs are extremely popular at weddings that aren’t budget-conscious. Whether you go for a simple brooch, or something wild – it definitely adds something extra to your chairs
- If you’re wedding is at a barn, and you’re going for a more casual vibe, hanging miniature bunting on the back of your chairs is a super cute idea – and fun too
- Adding extra details like pearls or rhinestones to your chairs can take them to the next level. It can be something as simple as tying pearls around the chair or sticking rhinestones to your bows
- If you have hessian string and peg clips, why not clip some photos of you and your partner throughout your relationship to each chair? It would be adorable and something memorable for your guests
Conclusion
I hope this article has helped you to know how to make wedding chair covers. Whether you’re an expert or complete novice, it’s definitely something you can try yourself. If you’re unsure whether you can, go to your local craft store and buy a piece of practice material. Practice on your dining room chairs – it’s easier than you think!
Did you make your wedding chair covers for your big day? If so, I would love to hear how you got on. Please leave any answers in the comments below – whether it was a positive or negative experience. It may help future brides and grooms to be.
Learn more about Wedding Dress For Less Than 500